For PDFs, Word Documents, PowerPoint slides or any other files you wish for students to access there is an easy way to add files to the course so that it lives within it's course files.
Before uploading files there are a few best practices:
- Give your file a meaningful name. Something like document1.docx doesn't tell what is inside the file. If you want to make links to the file in the future, figuring out what an ambiguously named file in the filing structure will be tricky.
- It is best to give your file title casing. Since the link auto generated by the the Content Selector gives the precise title of the document that is uploaded, a title like assign1_instr_2020.docx will appear as such in the page. Something like Assignment 1 Instructions 2020.docx will be much easier in the long run. This will make more sense in Step 5.
- And lastly giving descriptive and readable titles to your file will result in giving the created link a descriptive title. This matters for making your Canvas pages more accessible. This is inline with Accessible U's standards of Links.
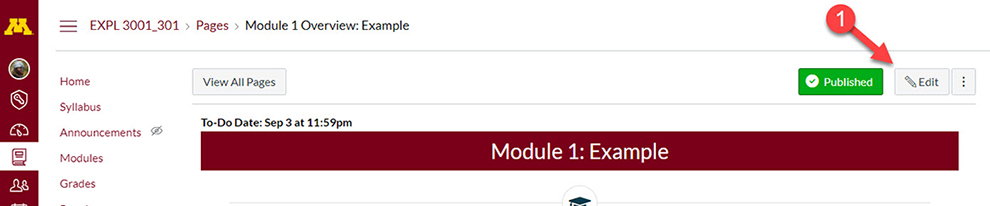
Step 1: Navigate to the Content
Go to the syllabus, page, assignment, quiz or discussion in which you wish to place your external link. Click on the Edit button on the top-right corner.
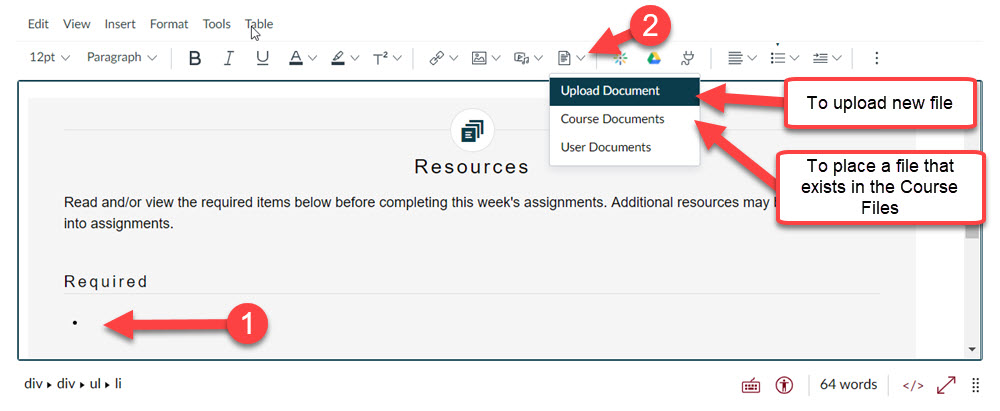
Step 2: Beginning the Upload Process
First, in the Rich Content Area, place your cursor at the point where you want the link for your file.
In the tool bar click on the drop down arrow next to the file icon.
If the file was already uploaded you should choose Course Documents. There you can look through the course files and find the field you want to add. Do this to avoid uploading potential duplicates of files. We are going to upload a new file so click on the menu option Upload Document.
Step 3: Selecting and Uploading the File
Once you click on Upload Document, a pop-up menu will appear.
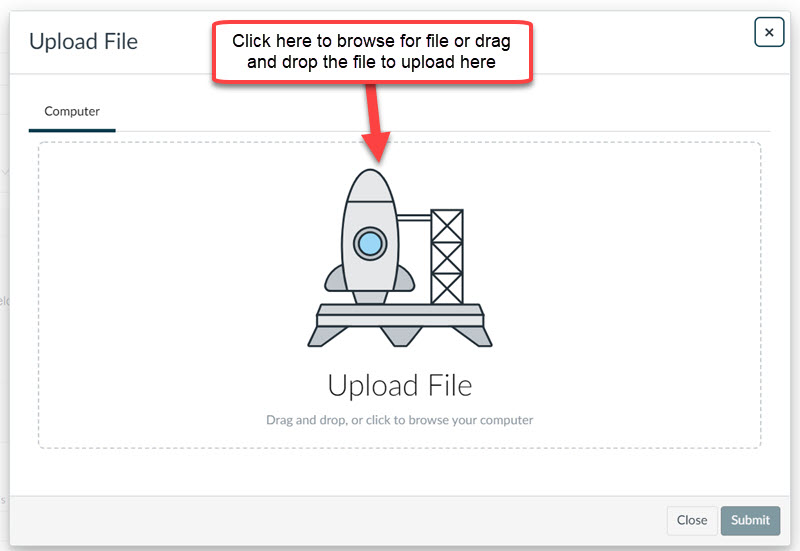
You can either click in the Upload File box to have the browse window appear so you can navigate to and select the file or you can drag and drop the file in the box.
When done, click on the blue Submit button in the bottom right corner of the pop-up menu. Once the Submit button is clicked, the image should appear where the cursor was placed in the rich content editor field. With the link placed. at this point you can just delete the extension for the file by highlighting it and pressing backspace on the keyboard.