As detailed in The Power of Rubrics, rubrics are a powerful tool for you as an instructor. To make use of them in your course though they will have to be created. Typically, during the design process for a new course or a redesign, an instructional designer will help you with the design, creation and implementation of a rubric. This tutorial is available if you want to try your hand at creating your own rubric for the course.
Step 1: Go to Add Rubric Page
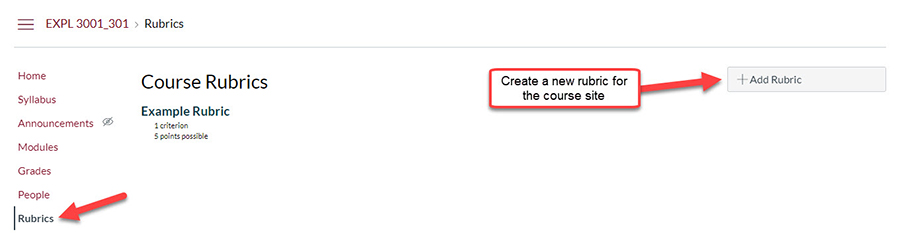
In your course site, navigate to the Rubrics in the left-hand navigation menu.
On the Rubrics page, on the top right, click on + Add Rubric.
Step 2: Edit Default Criterion
When you land on the rubric creation page you will see default criteria row in the rubric table.
In the first column you will see the description of the criteria.
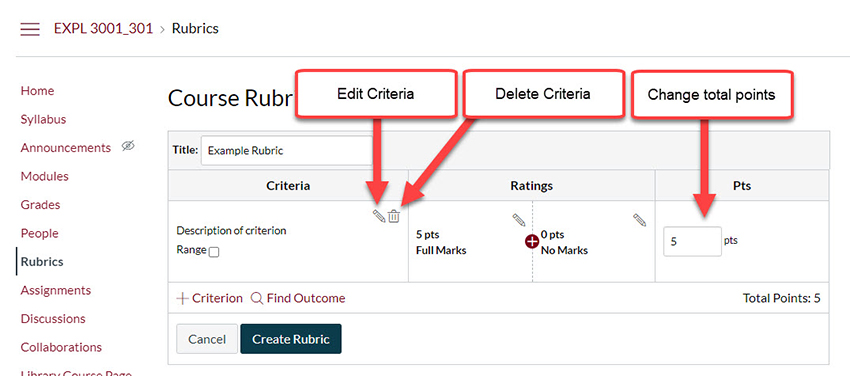
As shown in the image above, the pencil icon will let you edit the criteria description and long description. The trash can will allow you delete the criteria.
The last column shows the total points for that criteria. This is where you can adjust the total points for that criteria. Before making edits to the ratings we suggest changing the total possible points for that criteria here before changing the ratings since the points changed here are automatically changed in the ratings section.
Step 3: Edit and Add Ratings
The middle columns show each of the ratings. Each rating column shows the points or points range (more on ranges below) for that criterion, as well as showing the rating name and description. The ratings are organized with the highest possible scores to the left and no points to right.
In between the ratings columns there is a plus sign button. This button will allow you to add a rating that has points in between the two.
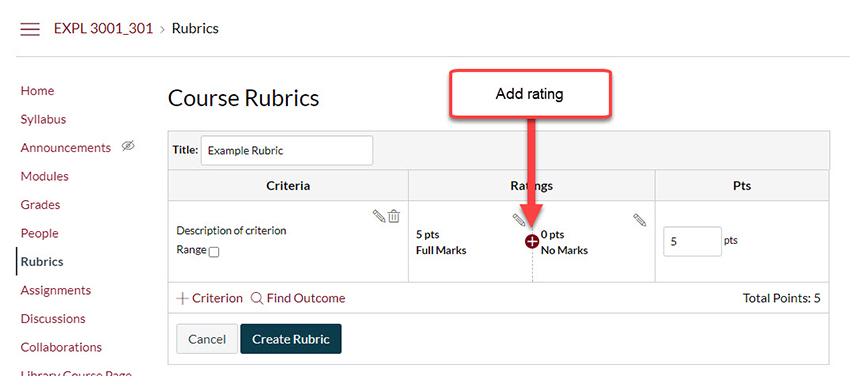
When you click on the plus sign the Edit Rating menu will appear.
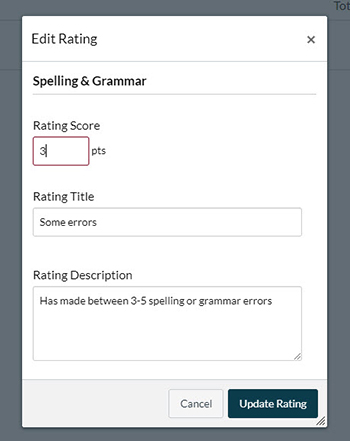
It will automatically enter a rating score in between the two ratings. The new rating points or points range need to be in between the ratings where you clicked on the plus sign. Keep this in mind because the tool will not allow you to go out of order.
The rating title usually denotes it's some kind of proficiency level for the criteria. For the rating titles we typically use are "Exemplary", "Proficient", "Developing" and "Not at Standard" but you are free to choose your own logical titles for each of the criteria ratings.
The rating description allows you to elaborate on that rating level. This area will help you with assigning ratings when grading particular criteria as well as a descriptor for students as to why they achieved a particular rating.
Once complete, click on the Update Rating button.
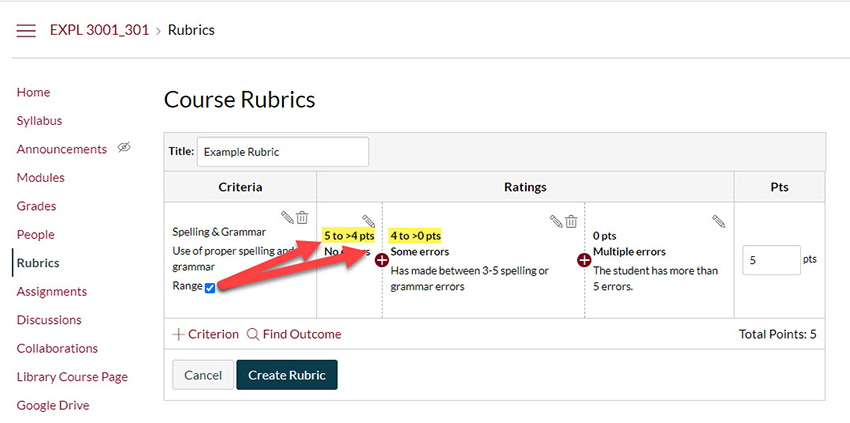
Points Range
If you want each rating t0 contain a range of potential scores, you can turn check Range in the Criteria column.
Step 4: Adding Another Criteria
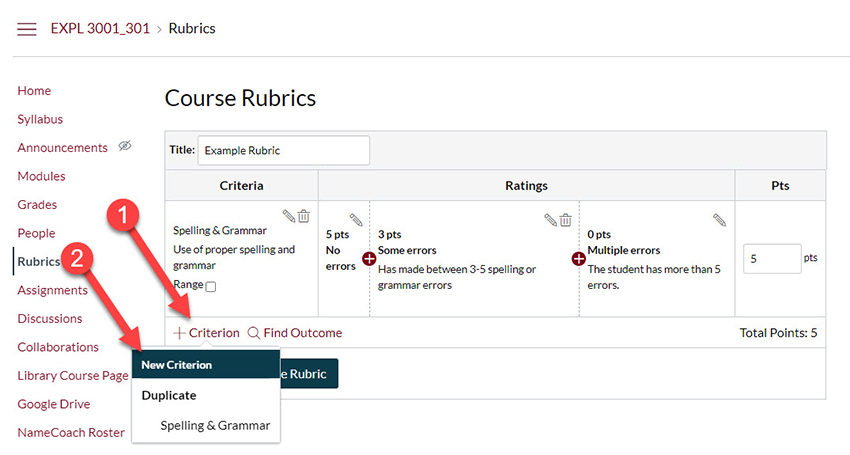
Now that you have created your first criteria, to add additional criterion, click on + Criterion.
You can begin creating a new one by clicking on New Criterion or you can duplicate one located in the current rubric by selecting the name of the criterion you want to duplicate in the list below. This might be useful if you are using a similar rating/point scheme and can speed up the creation of your rubric.
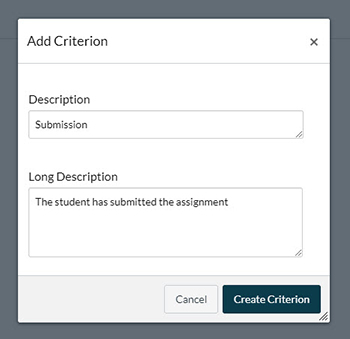
Once you click on New Criterion or are duplicating one you will see the Add Criterion menu. Here you will enter in the description and long description for the new criterion.
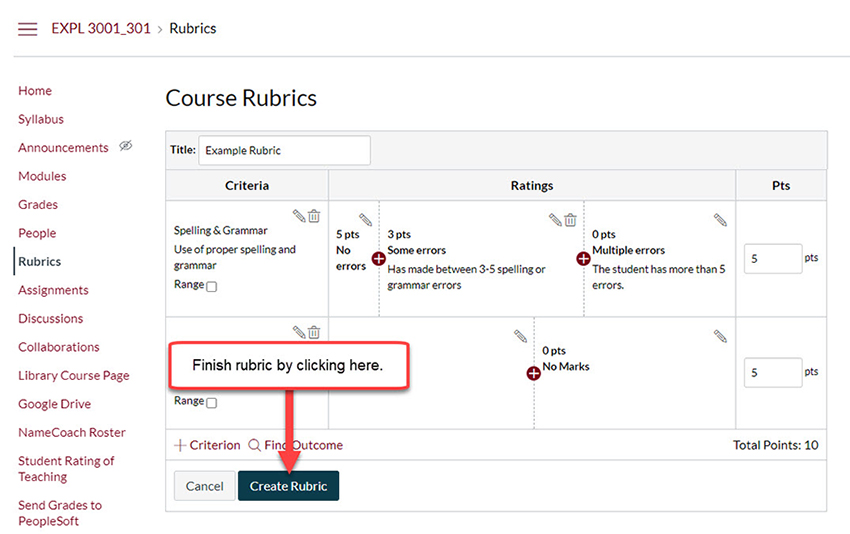
Step 5: Finishing Up
Once you have made the rubric, click on the blue Create Rubric button at the bottom to finish up the rubric.
Now that you have made your rubric, you will want to attach it to an activity or many different activities. Follow these tutorials to learn how to add your rubric to a desired activity: