If you need to make a quick video to talk to your students, the Kaltura Record a Video In Browser feature is a simple and quick way to make a video. All you need is a webcam and microphone in your computer. Most modern laptop’s come equipped with these features.
Step 1: Navigate to Record a Video In Browser Tool
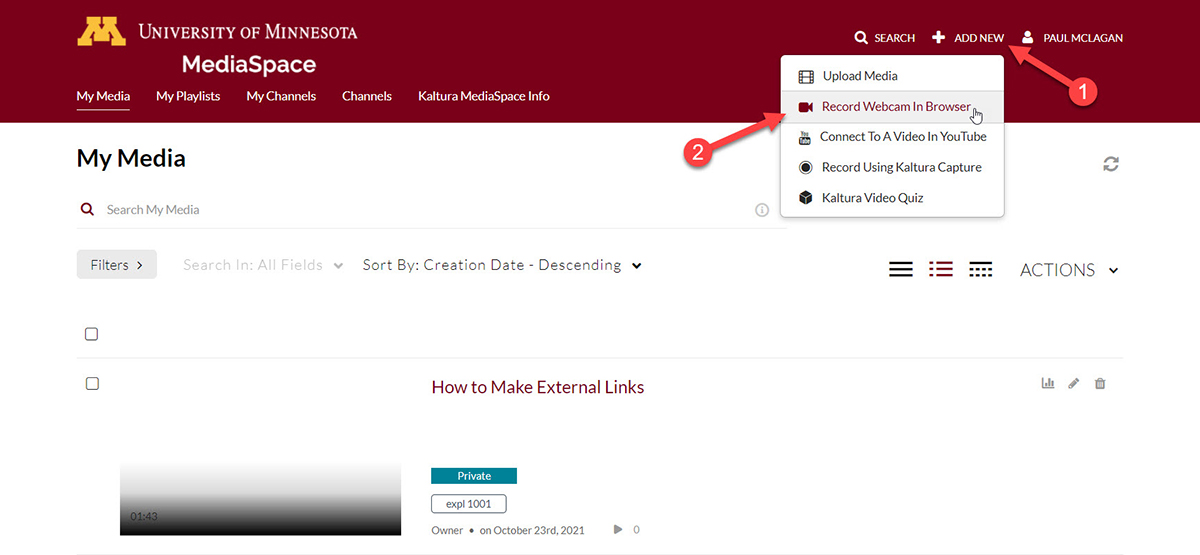
In Kaltura Mediaspace, click on Add New in the top right corner.
A menu will drop down. Select Record a Video In Browser from the menu.
Step 2: Allow Mediaspace Permission to Camera and Microphone
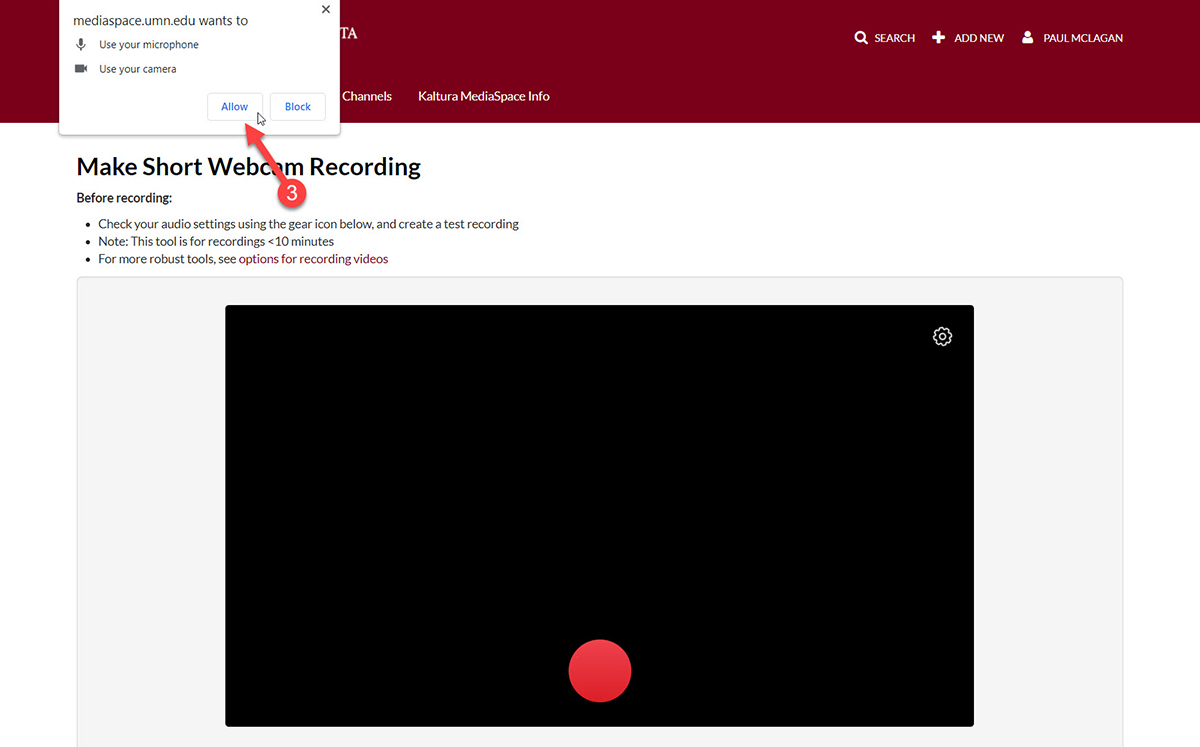
If a window appears asking if "mediaspace.umn.edu" can gain permissions to use your computer’s microphone and camera, click Allow or any selection in your browser that allows Kaltura Mediaspace to work with your computer’s hardware.
Step 3: Check Hardware Settings and Begin Recording
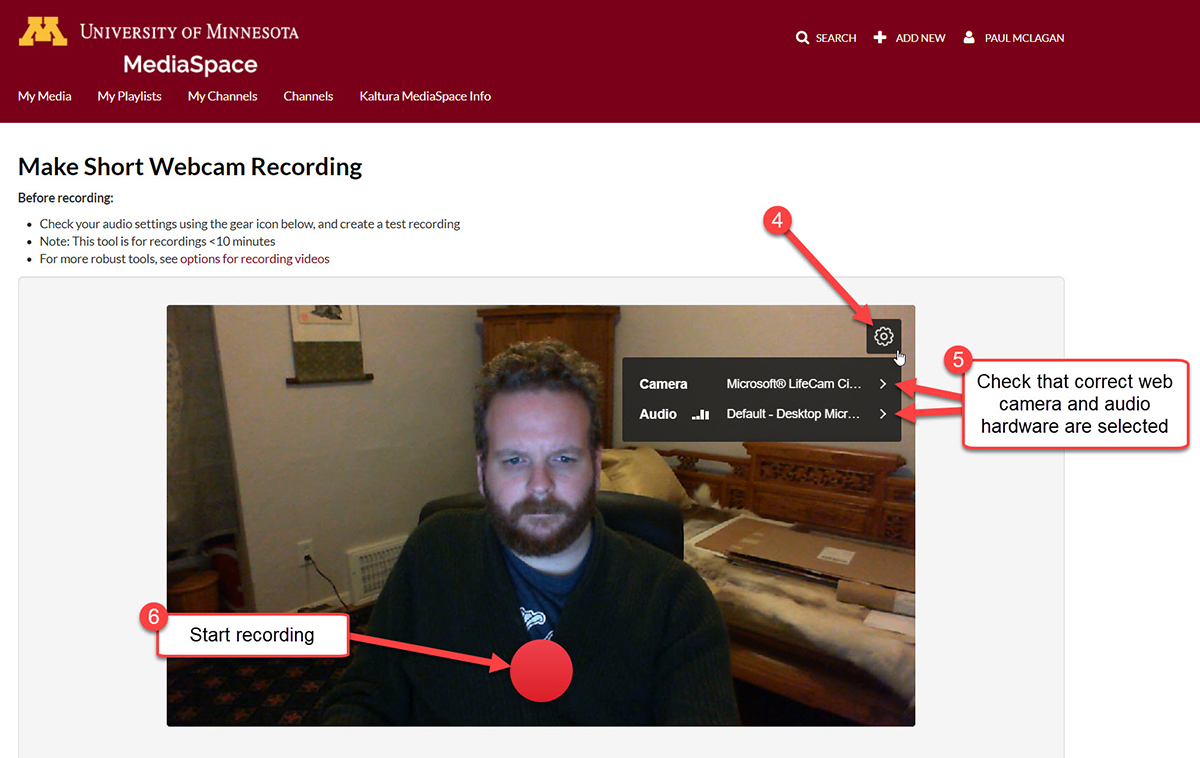
You should be able to see yourself on the screen. This will indicate that your webcam is functioning. You should check to make sure that your audio and camera settings are connecting to the correct hardware. This would be especially important if you are wanting to use a headset with a microphone rather than the built in microphone. You can check on these settings by clicking on the gear icon on the top right of the recording window and you can see what is selected. Clicking on the arrows will let you change the hardware feed.
When you are ready to begin recording, click on the big red button to start the countdown to when the recording. Once the counter hits zero, the recording has begun.
There will be a stop button that occurs with the elapsed time of the recording. Click on the stop button to stop the recording.
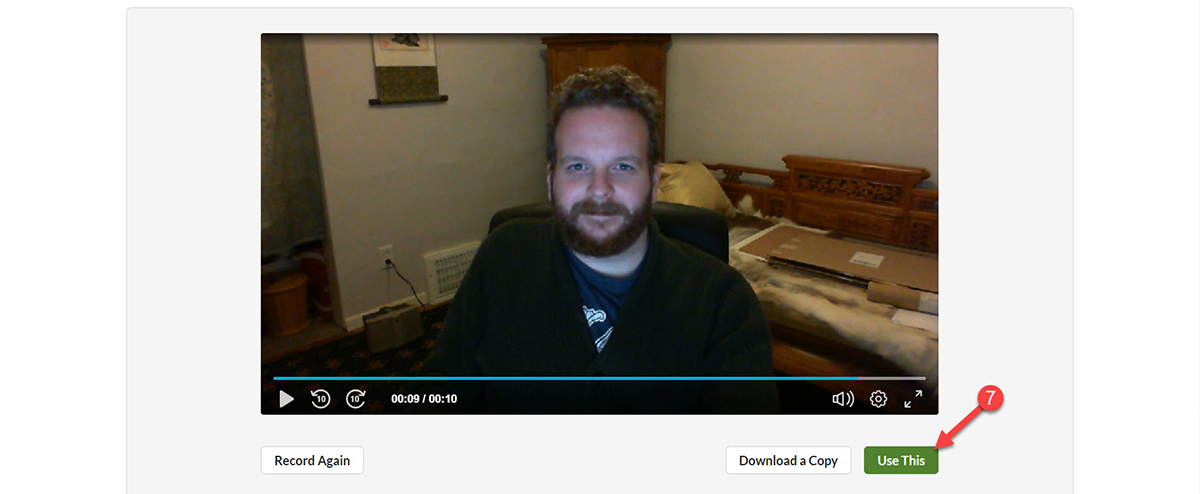
Step 4: Review and Post Recording
After you have stopped recording. You can playback the video to review it.
If you want to redo the shot, click on the Record Again button.
If you are satisfied with the results, click on the green Use This button.
Step 5: Setting Video Metadata
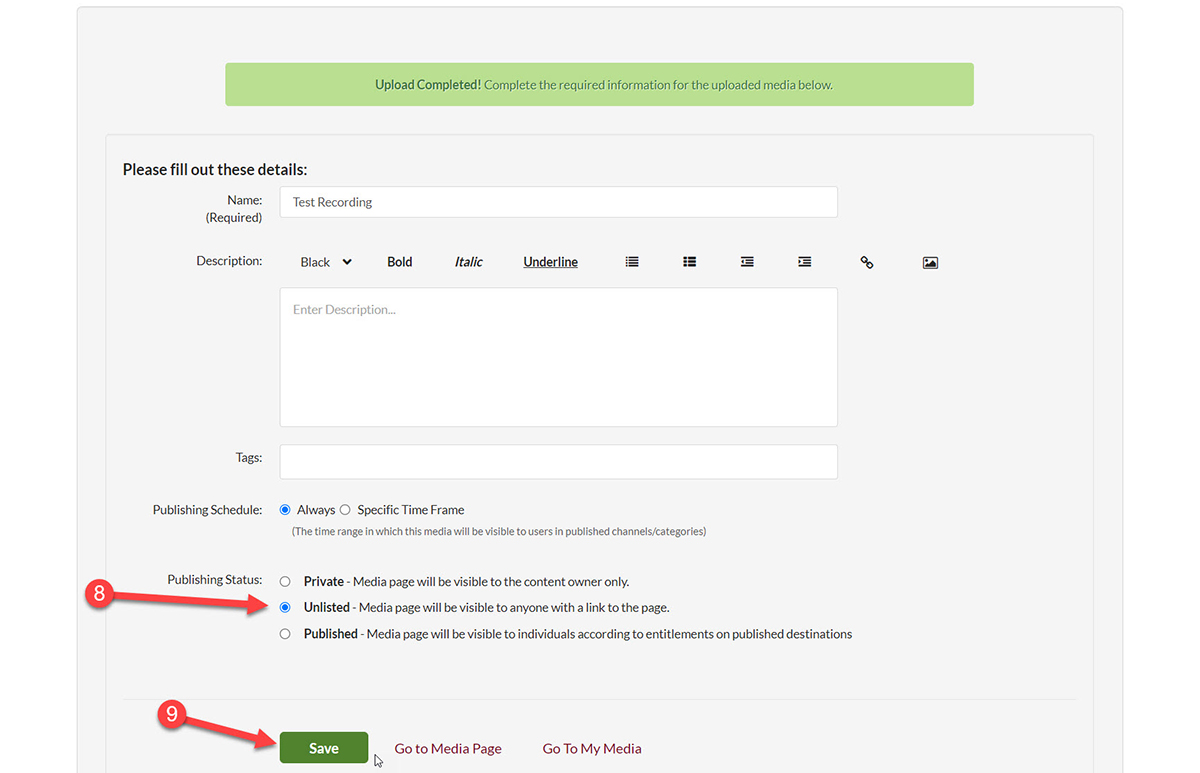
The video will process. Here you can fill out the details for the video. We suggest adding for the name a meaningful title for the video. Including information like what the video is, what module in the course it is for can be useful for searching in Kaltura later.
Under tags we suggest adding the four letter program abbreviation and CRN.
Under Publishing status, select Unlisted to make the video visible to any one with a link. This will make the video available to students when you link the video to your course content.
When you have changed the settings, click on the green Save button at the bottom.