In Kaltura you can upload videos and other types of media like audio files. Most commonly used video formats can be used if you have recorded a meeting or webinar in Zoom, ScreenCast O'Matic or a video that you have shot and edited in any number of other software.
Step 1: Navigate to Upload Media
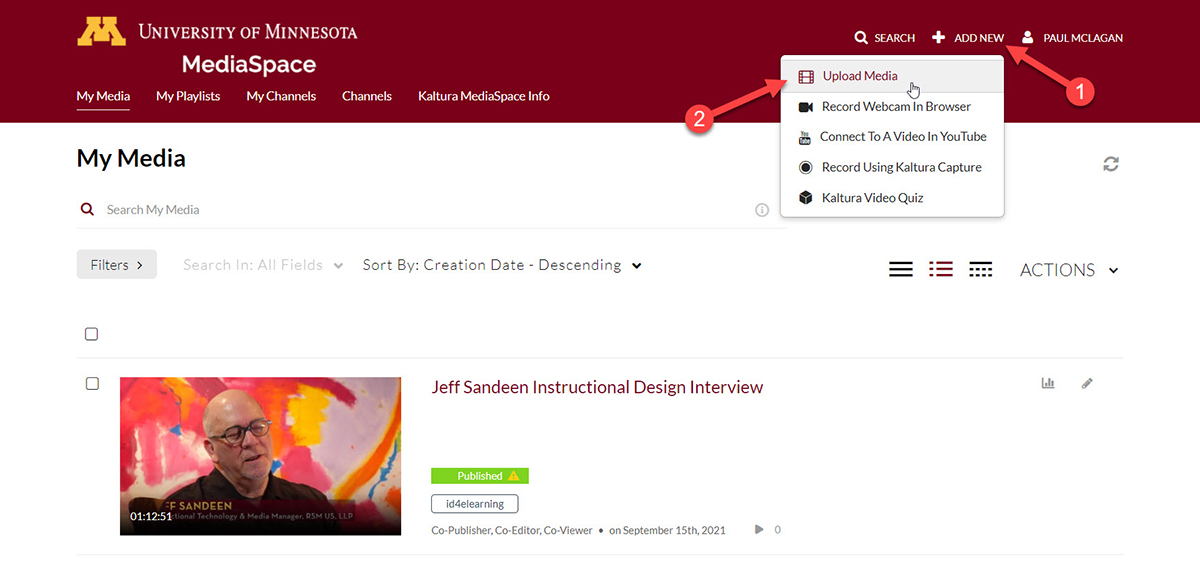
To upload multimedia, in Kaltura Mediaspace click on Add New in the top right corner.
A menu will drop down. Select Upload Media from the menu.
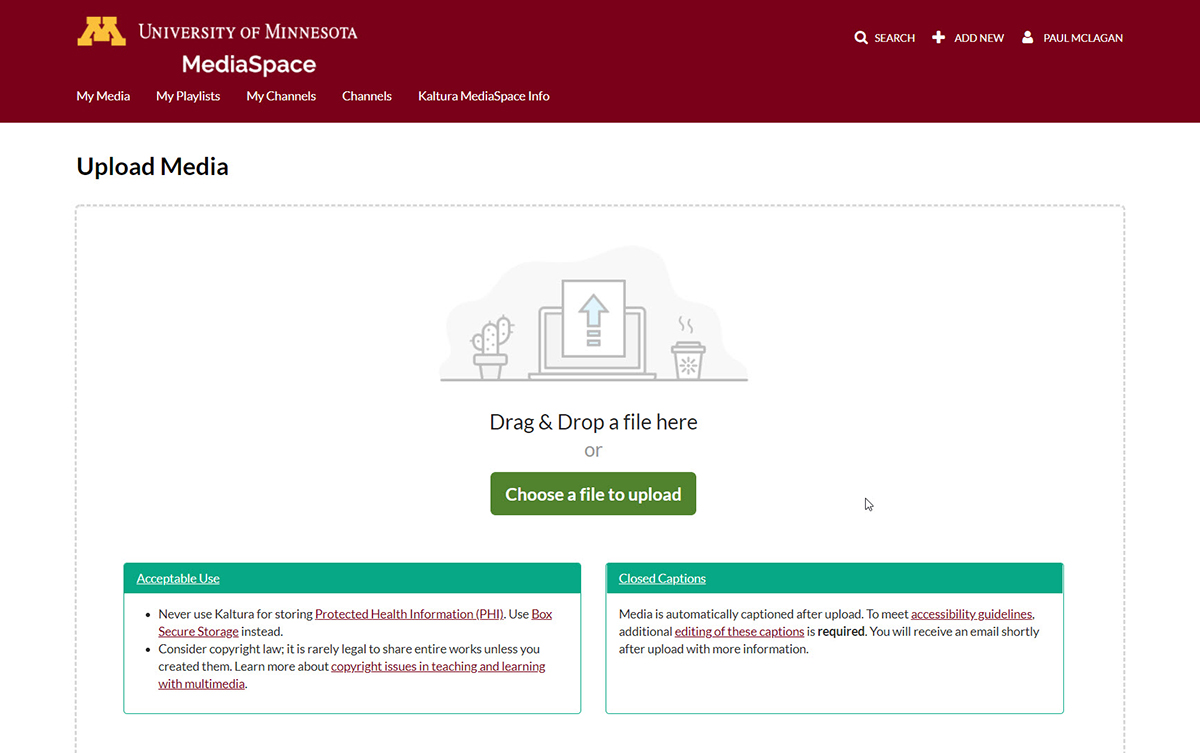
Step 2: Choose Media File to Upload
On the Uploading Media Page, you can click Choose a file to upload to navigate to the file through your operating system’s file browser or you drag and drop your file in the boxed area.
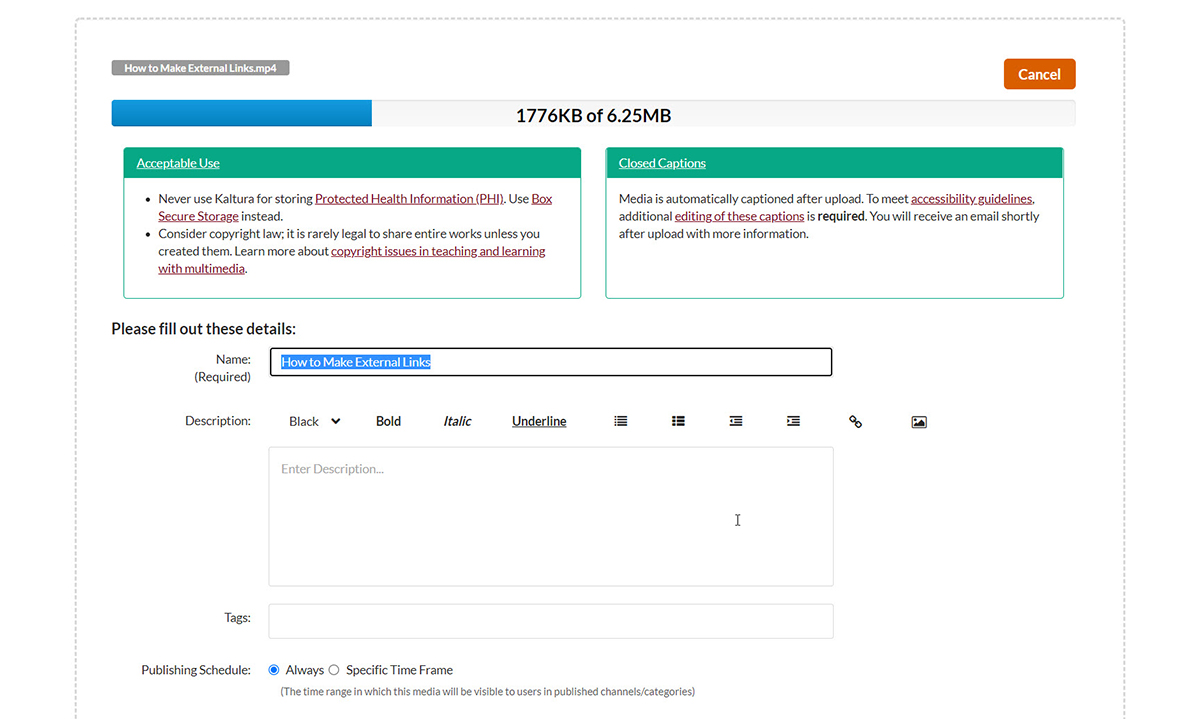
As soon as a file has been selected it will begin uploading.
Step 3: Add/Edit Media File Name
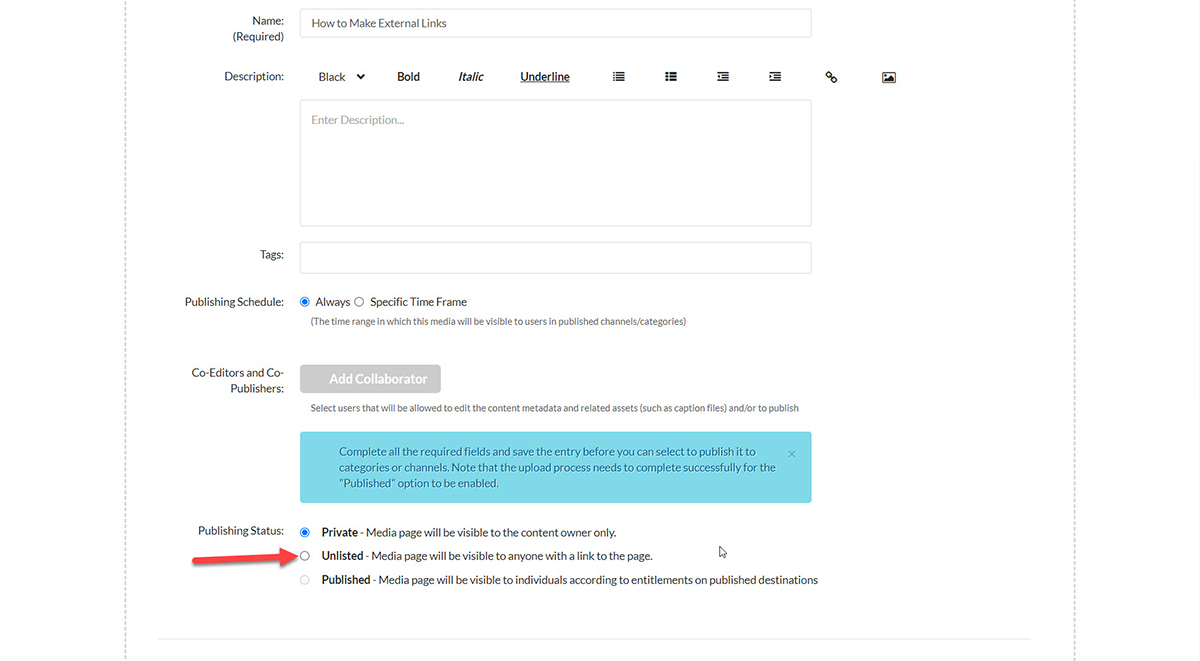
While the file is uploading, you can fill out the details for the video. We suggest adding for the name a meaningful title for the video. Including information like what the video is, what module in the course it is for can be useful for searching in Kaltura later.
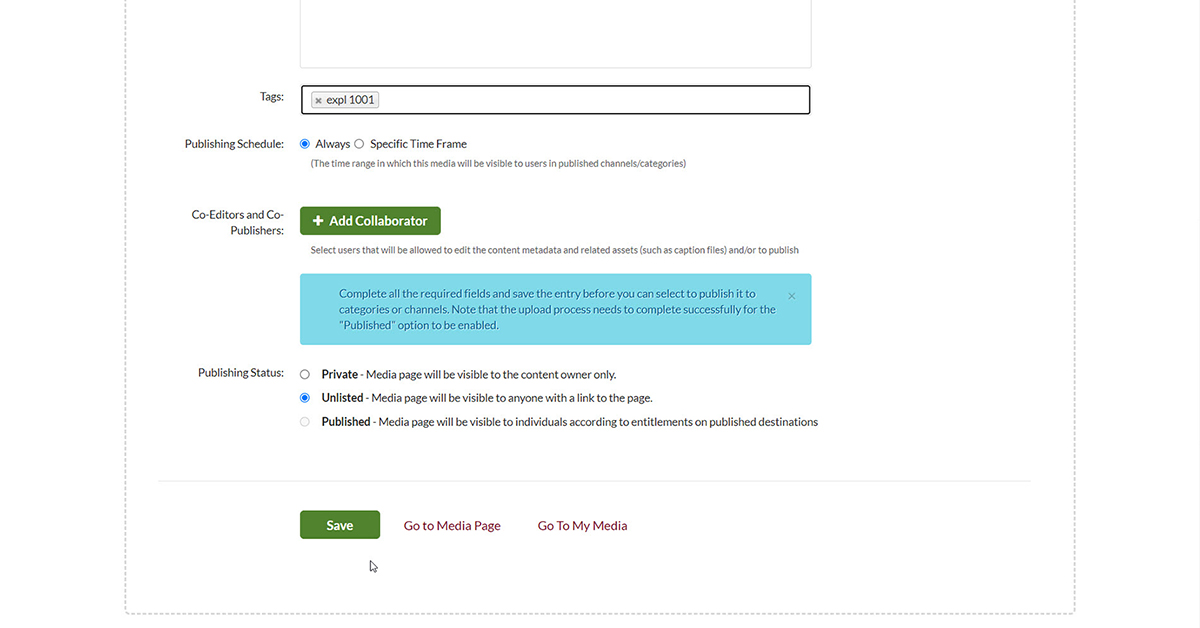
Step 4: Add Tags and Make Media Unlisted
Under tags we suggest adding the four letter program abbreviation and CRN.
Under Publishing status, select Unlisted to make the video visible to any one with a link. This will make the video available to students when you link the video to your course content.
Step 5: Save Settings
When you have changed the settings from steps 3-4, click on the green Save button at the bottom.
Depending on the size of the video, you will need to wait until the upload is done. The progress bar on the top will notify you of how much of the video is uploaded as well as when the video upload is complete.
Once the video upload is complete, it will be available to link to or embed.